Showing posts with label crafting. Show all posts

Thursday, February 13, 2014

Make this! DIY bow scarf.

Listen up! Because I spent 34 years living in the desert Southwest (Arizona) I had NO IDEA that scarves were anything other than a sometimes sweet fashion accessory. But NOW? Living in the Midwest, I KNOW they are a ABSOLUTE cold weather necessity. Since moving here, my girls and I have become obsessed with finding the holy grail of scarves that does its job to perfection AND looks super cute, to boot. I'm not entirely POSITIVE that this prototype right here is the HOLY GRAIL OF SCARVES because I am merely a beginner scarf wear-er, but I contend that the style is pretty darn good at keeping you warm AND I love bows more than I care to admit (as a grown-ass woman.) Plus, this scarf is SUPER cheap and SUPER easy to make. Its like the scarf-trifecta!

To make one scarf you will need:
  • a women's sweater - long sleeved, medium weight sweater, sized medium or larger
  • 1/4 yard - 60" wide velour or cotton knit fabric (you can use anything that has some stretch)
  • common sewing supplies: scissors, ruler, straight pins, sewing machine, thread, marking pen, etc


I purchased these sweaters at a thrift store ($2.49 each!) which is OBVIOUSLY a great place to get sweaters that you are going to cut up :) Look for bright or unusual prints and stick to the more tightly woven knits - that will make it SO MUCH easier to cut into the sweater without the entire thing unraveling. Also, make sure the sweater isn't ITCHY! It is going to be up against your neck. Also, keep in mind the color of your everyday coat - my coat is black felt so I tend to wear scarves that are more brightly colored. But if you have a purple or red coat? Maybe stick to a neutral color, you wild woman, you!


First, you are going to hack up your sweater: Cut the arms off, along the black line as shown. If you are working with a cardigan, cut off the band. If you are working with a pull-over sweater, after you cut the arms off, carefully cut up the middle of front.


You should end up with something like this - a beautiful sweater vest shape. Don't worry- this is not some diabolical plan to trick you into wearing a sweater vest! This is only a temporary situation.


Next, cut open the shoulder hems. Then, turn the mangled sweater inside out, line up the bottom hem and pin the arm holes closed. You are working to achieve a rectangular piece of knitted fabric. Sew the armholes closed, while maintaining a straight line from bottom hem to shoulder. You may have to sew down each side, in its entirety. Then, trim any excess.


You should hopefully have a piece that looks something like this. Isn't this pattern amazing?


Now, trim your piece down to approximately 20"x30", making sure to keep the seams on each side as even as possible by trimming off of both sides. (you should size down for kid sizes.) Now, fold your rectangle in half, right sides together. Pin and sew a straight stitch, leaving a 4 inch gap open in the middle.


Now, you will create the bow ends. Take your piece of stretch fabric and , with right sides together, round off each end, as shown. Pin and sew. There is no need to leave an opening. Once the entire piece has been sewn, fold and cut in half at the middle. Turn bow ends right side out.


Next, adjust the placement of the seam on the sweater piece so that it is in the middle-back, as shown. With it still turned inside out, place each of the bow ends inside the sweater tube, as shown, and pin in the middle along both ends. (There is no need to leave the tails out, as shown, that was done to further illustrate the step.) Sew along each end. Turn the whole thing right side out through the opening. Finally, either whip stitch or machine stitch the opening closed.

I wish I could say that I think that scarf weather is almost over..... but yeah, no. Its 8 degrees as I sit here, typing this. At 2:20 p.m. Today's high was somewhere around, ummm, 8. That's without the windchill, my friend. So, viva la scarf!

I've made about 6 of these so far, with no end in site. (PSST - if you crochet or knit, you can whip up a tube out of thick yarn if used apparel freaks you out. And then just sew in the velour bow ends. You wouldn't need to worry about raw edges so just stick the right-side-out bow ties in the ends and top stitch in place. I made my girls some of that variety for Christmas. Not to say that much skeeves me out. I am pretty much low skeeve.)

(mad props to my youngest for braving the elements ( NEGATIVE 11 DEGREES) to model for her crazy mom.) 
But seriously. Doesn't her neck look WARM? :)


Friday, February 3, 2012

We heart Minecraft {or} A very Geeky Christmas

Filed under {better late than never} a recap of Christmas 2011. December was filled to the brim with two ill-conceived, last minute CRAZY OVER THE TOP sewing projects that were the brain-child of my dear, sweet, crazy, pain in the ass husband. In late November, he asked {all innocently}what I thought about sewing a few SIMPLE quilts for Cam and Bo {13 and 12 yr old sons}. I knew they had been OBSESSED with this game MINECRAFT for about 6 months and he thought they might enjoy some super geeky themed quilts. I was all game, since I had just painted them super simple cardboard masks for Halloween and the design seemed like it would be straightforward. Yeah. I was SO NAIVE.

Halloween 2011

As soon as I agreed to whip up some quilts, I promptly forgot all about it.

...

Fast forward to FOUR WEEKS BEFORE CHRISTMAS and my dear pain in the ass husband asks me if I am ready to talk about proposed quilt patterns and a Joann's shopping list. And then he shows me the pattern he made on excel and it wasn't a lap quilt. It wasn't just a 64-square creeper face.

Creeper pumpkin

{creeper face aka what I was expecting to recreate}

 It was  INTRICATE. It was SCARY. Yeah. Did I mention I had only ever made ONE quilt before IN MY LIFE? And that I REGULARLY question the sanity of quilters and their need to cut up PERFECTLY GOOD FABRIC only to SEW IT ALL BACK TOGETHER AGAIN? Yeah. True Story.

So, then I dove head first into these crazy projects. And while they are FAR FROM PERFECT, the recipients loved them and I think they turned out pretty damn awesome.


This is C's {Steve with an axe}

Minecraft Quilt DIY project - Steve

And this is B's {A zombie with a pig}

Minecraft Quilt DIY project - Zombie Steve

{the girls were so pleased with new dolls, they didn't notice there were no quilts for them}

Christmas 2011

I don't plan to do a full tutorial of the quilt because I am ready to put the whole, painful incident behind me. But I would be happy to share my excel pattern file and basic quilting concept {that I am fairly certain breaks EVERY SINGLE QUILTING LAW EVERY WRITTEN} with anyone crazy enough interested. Just email me or leave a comment :)  I lost the excel file in the harddrive crash of 2012 :( SORRY! Yeah, because all those blue squares? I cut apart blue fabric and then re-sewed it all back together so it looked like pixels. Hell. Yes. True story.


Tuesday, December 20, 2011

{Update} .. the painted couch ..

I woke up to more traffic on m' blog than the usual three hits I get a day {bestie, mom, sister} so I figured that Apartment Therapy {aka my biggest refer-er on the ol' world wide web} had mentioned my silly painted sofa again.

Yep. I was spot-on.


I also got a few new comments, asking for an update or more info. So, here is where I actually answer a question in my comments. Don't die of shock or anything.

Victoria said...
Now that you have lived with the sofa for six months, can you tell us if it has softened up? How does it wear now? Are you still happy with it?


I am still absolutely smitten with this sofa. It hasn't cracked or peeled, but it does get very dusty (disclosure: I live in Arizona right on a mountain preserve, so we have more than your average dust + wind} so I wipe it down with a damp cloth weekly monthly {I probably should weekly, but I am not the tops on housekeeping} Also, on the arms  {where you might have those slip-cover things to prevent wear?}the paint is wearing more there. I have plans to touch it up but, ya know. Life.

Overall, still a project in the success column. Except for that HIDEOUS fabric I chose for the cushions....


Yeah. Totally kidding :)


Saturday, August 27, 2011

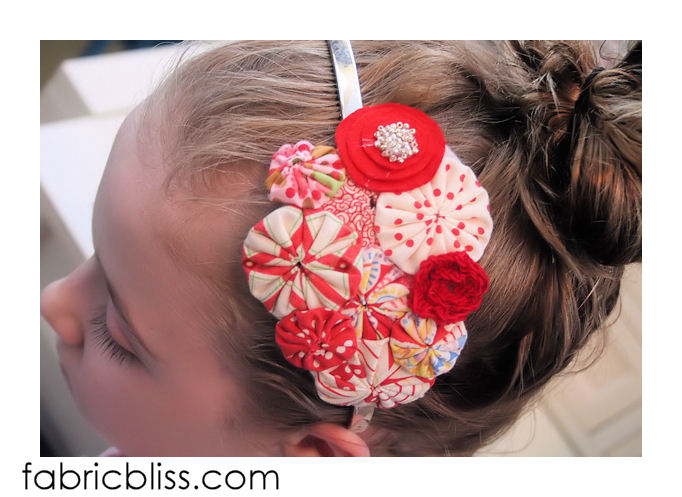
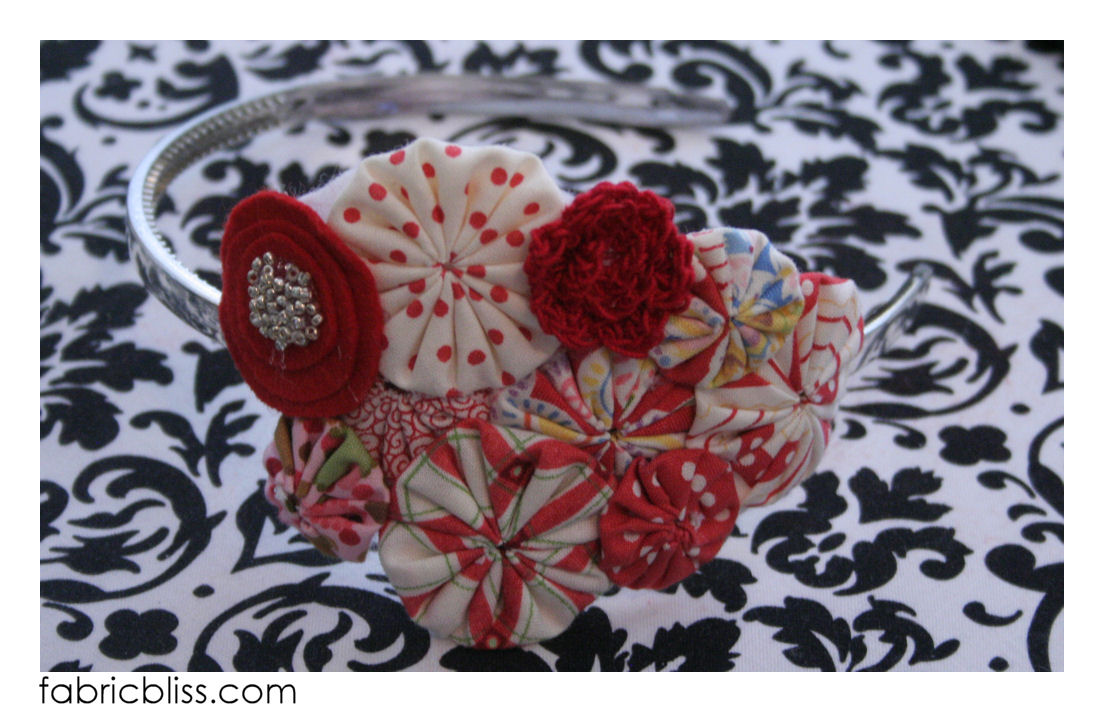
{make this!} The yo-yo headband that you ALMOST forgot about :)


Hi friends!  When I became a total star ... started on my quest for craft world domination ... made my television debut last week, this headband was one of the two YO-yo-yo projects I intended to talk about making. And then we took so long talking about the tank top and, well, actually just MAKING a yo-yo, I never actually got to this one. I am quite certain there might be one person out there that is interested in this, so One Person? This is just for YOU :)
completed_headband_02

The headband is pretty simple, just a collection of yo-yos on a felt base. 

To make one of these little suckers, you'll need:

-A plastic headband - I bought a pack of 5 at the dollar store, for, well, A DOLLAR :)
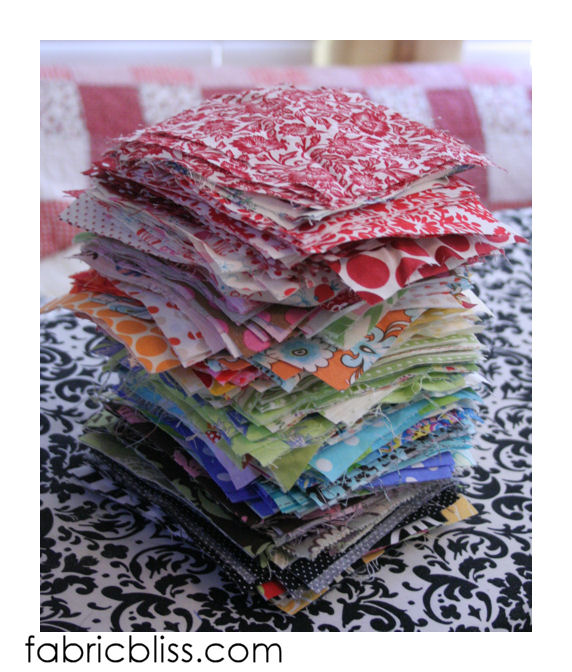
stack_of_fabric 


-square fabric scraps or a charm pack - stack them up in rainbow color, because that's just really more pretty to look at :)
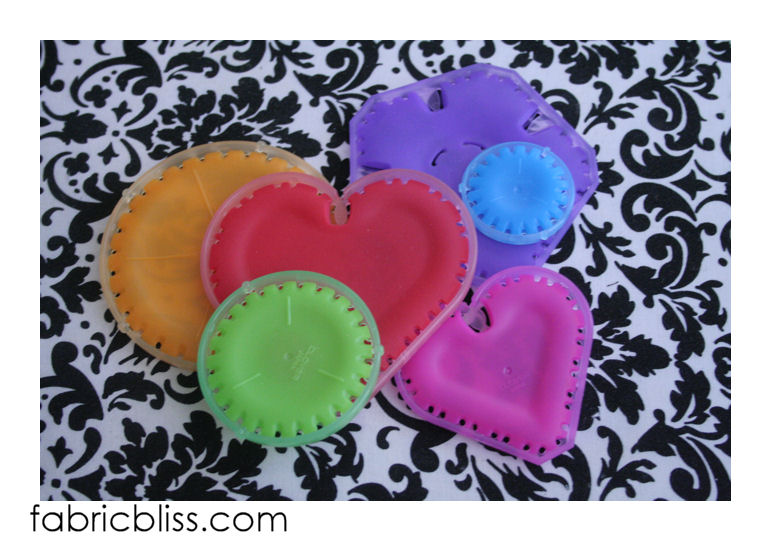
yoyomakers

-yo-yo makers in various shaped and sizes {or an old trashed cd to trace if you don't have a yo-yo maker} 
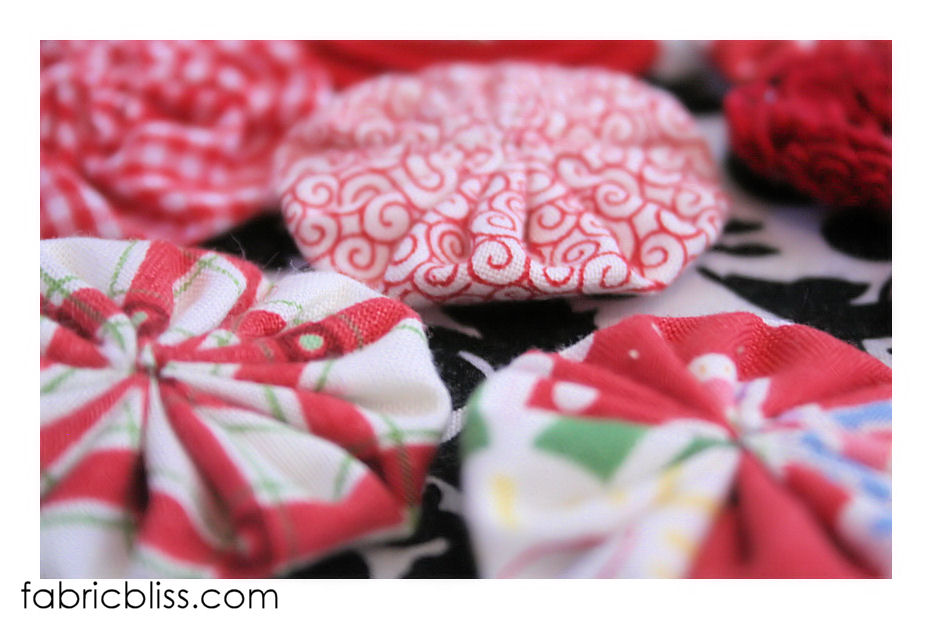
red_yoyos

-a handful of buttons or flowers or stacked felt flowers {I will show you at the end how to make a simple one} and at least 8 finished yo-yo's.

headband_felt

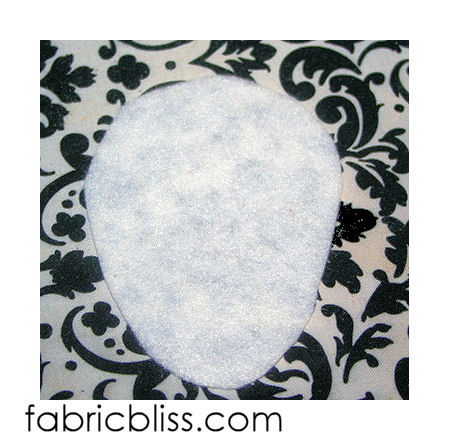
A piece of white {or any coordinating color} craft felt, cut into a bean shape, approximately 4 inches long.
headband_tutorial

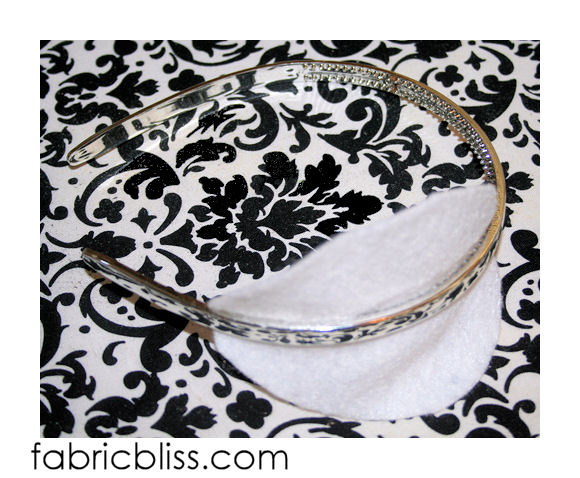
To start, make your yo-yos. Don't have a yo-yo maker? Go here. Now, glue the felt piece to the underside of the headband, starting where ever you'd like your patch of yo-yos to be. I did these off to one side {and since there is no front or back? It can be worn to either side}.
yoyo_headband_tutorial_01

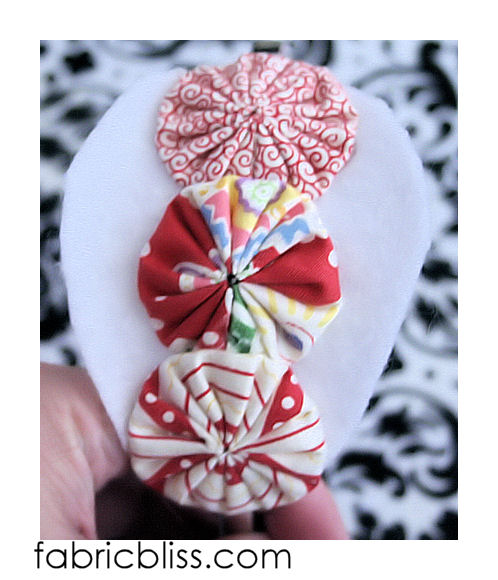
Start building your patch by first covering your headband with three large yo-yos. Securely glue the yo-yos to the felt as well as the headband. Then just glue the rest, overlapping, over the rest of the white felt, covering the felt as much as possible. Trim away any edges that aren't covered.

stacked_felt_flower

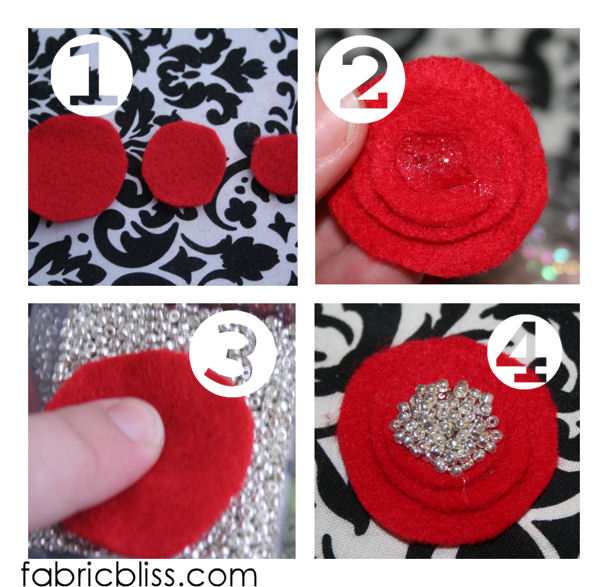
To make a quick beaded and stacked felt flower:


  1.  Cut a small, bigger and biggest circle out of felt. {smallest is about the size of a penny}
  2. Glue and stack together. Once all glued together, put a generous ball of hot glue on the top in the center
  3. Carefully push the glue spot into a pile of small seed beads {while the glue is still HOT}
  4.  Let the glue dry and then flick off any loose beads

completed_headband